Total Pageviews

Showing posts with label Customizing Wordpress. Show all posts

Monday, September 5, 2011

Ghost in the Shell: Visual Editor in posts hides navigation

Posts are funny things. They have a few features that Wordpress keeps enabling and then disabling every few times it releases a new version and this time the "<prev" and "next>" buttons are automatically disabled. Maybe that's for the best. When they are enabled they are hard to customize and move around. The code for manipulating them is buried deep inside the Wordpress core. There have been a number of plugins that try to solve the problem but if you use both posts and pages in your site and want the "prev" and "next" buttons to look alike on each type of publication you are out of luck: plugins add navigation buttons for either posts or pages but I haven't seen any that added the same sort of button for both so  a user is left to manually build navigation buttons if they can't make the menu work as they would like.

In this case though I get the feeling of "can't live with 'em , can't live without 'em". In making my own manual navigation at the bottom of the posts pages I use the words previous and next. Wordpress seems to pick these up and hide them in the Visual editor, making editing a bit of a pain. Here everything must be edited in the HTML view.

One must click "edit post" avoid viewing the "Visual" tab go straight to the "HTML" view and add new links manually there.

I'll keep looking for a solution for this, but until then copy and paste the general code form previous posts into a new post and edit links by cutting and pasting them in place. I've listed this issue with Wordpress codex.


Oh Wordpress.


Ghost in the Shell: Fighting off comments!

Well I've had highs and lows with hiding post comments.  Several plugins failed to do the job and now I've pulled another and added a new one that seems to have 5 star reviews and about 7K downloads which is promising.


This one is called One Click Close Comments and it lives up to it's name.  Install this plugin and look at the "Posts" section. Click on "All Posts" and see that the plugin has placed a small red or green dot in the info about each post. Simply click on this and status will change. Green means comments are GO and red means comments are CLOSED.

Then check your post pages. A default message of "Comments are Closed" will appear.

Now go into the "Appearances" section. Click on "Editor". Go here only if you know what you are doing. Make sure site is backed up before you make any changes.  Look for <p></P> with "Comments are closed." message. Simply remove message! Don't change anything else. This time comments have vanished without leaving a trace and that's something worth celebrating.


Thursday, September 1, 2011

Scale Images Wordpress: scaling images after upload

When I start building a site I usually rush to put up content. Its something like the feeling of a canvas being easier to work on after you've added that first dab of paint: the void is just a little too much to tackle on a whole and too much planning before you start can start to build anxiety or uncertainty around the actual beginning!


So that being said- I often upload images at a large scale and understand afterwards what the the realistic scale I'll need to use them at actually is.  You'll be glad to know that Wordpress has planned for this sort of behavior.

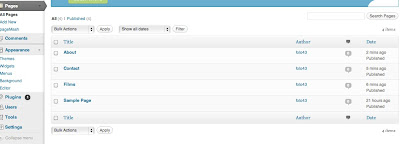
Go into your dashboard and go to the "Media" section. Under "Media" select library and find all of your images noted here. Hover over the image title and select "Edit" from the menu that appears below.
Once you are in the screen where you can edit your image look to the left and see "Scale Image". Select "Scale Image" and the panel will expand.

After loading my images of all sizes I realized the largest dimension any image would need in the site was 300px. I've gone back through my site and made 300px the cut off dimension for all of my images--- some images even have a cut off of 180px.

Scaling images in this way optimizes your site-- this means a page that shows an image at 100px by 100px doesn't spend time processing a much larger image and then scaling it down. The end result is a site where pages load as quickly as possible!

Sorting Images in Wordpress Media Library


A Wordpress media library can easily become muddled-- you may load more than one version of an image and only remember this later when you go to alter that image and have a hard time finding it. Another dilemma you may run across is that if you make the image titles something funny and distinct, when you mouse over the image you see this weird title pop up on your website or blog.

The solution to this is very simple and one that's easily overlooked. When you are in your dashboard look under the "Media" category and go into your"Library" here you see all the images and icons you've ever loaded.

Simple select "edit" in the menu that pops up when you hover over a title. This should pull up all the info for that image. Here you'll see the title to the image but look below to the catagory called "Alternate Text". This is the are where you can put the actual name you want a visitor to your site to see when they mouse over your image. Use the main title for your own purposes if you need to. You can keep the original title hidden and use it for indexing.

Also note that when you are viewing all images in the media library if you look across the categories of information you will see one called "attached to" and this will tell you where the image is currently being used in your site or the "Location of the uploaded file."


A tricky thing here to note is that if you load an image and then remove it form the site afterwards but want to keep in in the Media Library the file will still be noted as located in the page you originally upload it to. Hence my interest in using titles as labels!


Tuesday, August 30, 2011

Adding order to posts in Wordpress

This is pretty simple to do. I added all the posts I wanted to my site then went through one by one and edited the date of publish- most recent dates appear first in order.


To do this I simply went into "edit" each post. I look at the page where I compose a post under the "Publish" section.
I look at the text that says "Published on: Aug 6, 2011 @ 18:42 Edit". I click on edit. I numbered my posts starting form 1.1.2011 all the way up to 1.21.2011. I make a note that all my posts are published at noon. If I need to add a post I can pick an hour of publish that falls between two existing publish dates and times. If I need to add a new post that shows up as the most current I can just pick the next date in my series of dates and that will show up first OR I can pick an earlier date and my new post will go way down to being the last post in the batch.


Also I went to my dashboard again and I went into the permalinks section. Here I selected the option to order my posts by day and name.

Monday, August 8, 2011

Make part of link menu not active: Wordpress

I'm pulling form another page.
Here's how to have a menu with part of it (parent) as non-active

"Plus with the new Wordpress 3+ menus you don't need to install the plug-in, just create a custom menu item that points to the URL "#" and position it as the parent, then arrange your pages as its children. This means you can have some parents items that aren't pages at all while others can be both parent items and pages in their own right."

Tab for custom links is on the left I literally didn't see it until I needed it. Take out the "http://" stuff and just add "#".
Here's a link to original post where I found this. Thanks other bloggers!

Saturday, August 6, 2011

Center a video on Wordpress


That's all!

Add PDF to Wordpress that you can download

For the sake of putting everything in one place, here's how to set up a PDF on wordpress so that you can download it.

Wordpress Gallery: No borders no margins: ditch the gallery

After doing a million things to try and adjust my wordpress gallery I've ditched the gallery. I went in and made changes to my template style css. I'm using Wordpress 3.2.1 and I'm using a Graph Paper Press template called Fullscreen.

I first went into my style.css in the "editor" section of my dashboard. If you're lost, the "editor" section is found as a sub-category in the "Appearances" section. This section appears in menu on the left side of your dashboard.


Okay back to editing...


I changed all the border values to zero. No need to add a unit of measurement here so you can ditch the px or em unit as you adjust.

Then I went into the "Floats and Images" section of my style.css and changed the align values to not just left, but top left.


That did the trick!

Tuesday, August 2, 2011

Creating Menu in Wordpress 3.2.1


Alright now I'm going to create a menu. I've gone into my dashboard and I'm looking to the left. Under the category titled "Appearances" I'm going to select the sub-category of "menu". On the right I'll get a box prompting me to add a name and then I'll hit the blue "create menu" button at far right. I've named my menu "Basic"

Ta da! My basic menu is created. But there's nothing on it yet.


Now look to the lower left side. There are a number of boxes and one of them has all of my existing pages listed in it. Then I'm going to check the "add to menu" button below. Here I'm going to go in and add check the box: these pages will be added to my menu.


To add a drop down element with sub-categories to any of your pages drag and drop the sub pages under the lead page and pull the bar a little to the right. sub-category pages are offset a little to the right. Drag and drop the other pages in the order you'd like them to be listed. Don't forget to hit save menu when you're done!

Add Menu and Pages to WP template


I'm going to add pages and a menu to my WP 3.2.1 website. I'm going to go to the Dashboard of my site, select "pages" from menu bar at left and then will select "add new" from top of page.
For now I'm just adding a title so that the page is created. I've given my page the title of "ABOUT" and then I'll look to the right side and hit the blue "publish" button. And...then my page is created!


Then I'll click on the "pages" section at left and I can see all of the pages I've created. When I hover over the title of the pages it gives me the option to " edit/ quick edit/ trash/ view". I'm going to go to the sample page and just select "trash" since this page was in here automatically just for filler.

That's it! My core pages are added.


Working With Wordpress

I am working on a website with Wordpress 3.2.1. ( refered to from here on as "WP") I am making a variety of changes to the WP set up and I am using a template from Graph Paper Press called "Fullscreen".

I am making use of the following plug-ins:

Unattach: unattaches files from original URL
Easy Fancy box: WP version of shadow box/ lightbox
Pagemash: File management interface

and a few things that came with the WP install:
Askimet: prevents spam
Jetpack: interface for cloud support ( not gonna use it)

In following posts I'll detail how I made changes to the blog. I'll include links and tutorials.